...
Step | Description | Image | ||||
|---|---|---|---|---|---|---|
1 | Perform a regular migration using Atlassian’s migration assistant. | |||||
2 | 6 | Configure the rest of your topic. | 7 | Export On your Server/DC instance Either export a single topic to a JSON file using the REST endpoints export or export2 /export2 REST endpoint on your Server / Data Center instance as described here (please expand “Using the REST interface”) . Please name the export file exactly “sqa_export.json” and save it on your computer. | 3 | Upload “sqa_export.json” to the topic page (the page holding the Overview macro of the relevant topic) as attachment. |
4 | Edit the topic page and then edit the overview macro. In case everything went right an additional tab called migration will show up. 💡 Please remember that you must be an admin to see the migration tab. | 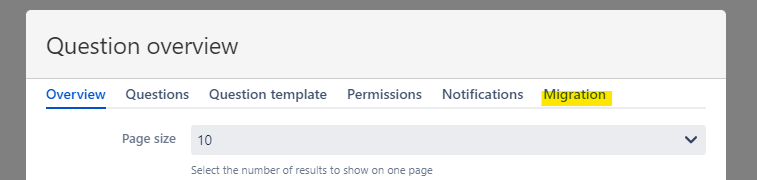 | ||||
5 | On the migration tab make your settings (we recommend to keep them as they are for now) and then hit “Run migration”. The migration will now start and you will see all details under migration results. In case everything worked fine and you have checked that you are happy with the migration result you may check “Delete comments…” and run the migration again. This will delete the old comments not needed anymore. | 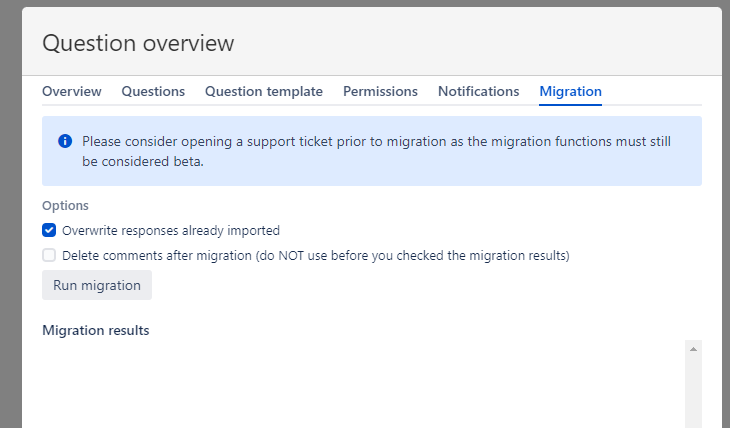 | ||||
Repeat the steps for all other topics you want to migrate.or export all topics using the /exportAll endpoint. 💡 Both endpoints deliver an url and a download link first. When you click the download link you will either get a message that the export has not been finished yet (ready : false) or the browser downloads the file already. In case the export has not been finished yet, reload the page e.g. every 10 seconds until you get the download. | 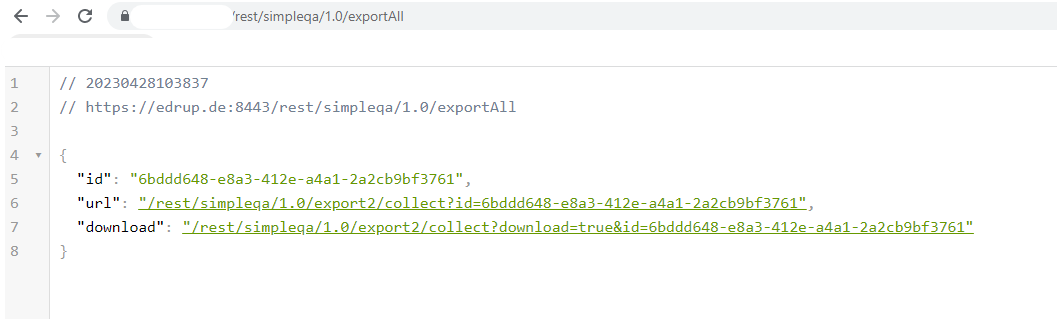 | |||||
3 | On your Cloud instance First navigate to:
Example:
Once the page has been loaded you can configure the migration:
| 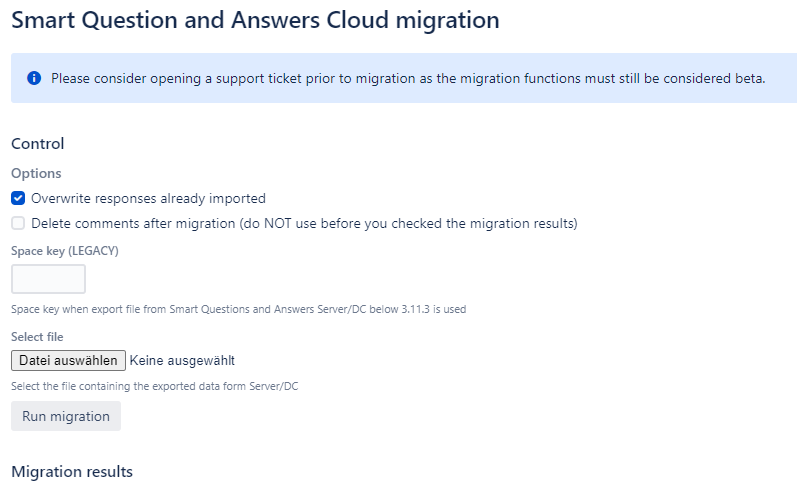 | ||||
4 | Select the file you have exported under step #2 and run the migration |